|
‘Butterflies’
Create four Smart-fab butterflies! |
|

|
|
Materials
One sheet of Purple Smart-Fab
One sheet of Pink Smart –Fab
One sheet of Yellow Smart-Fab
(You can choose any three colors of Smart-Fab that create the same contrasts in your butterflies)
2 butterfly patterns – 1 large and 1 small (click on the link to print them)
Scissors
Marker
Double-face adhesive or Fabric glue
Needle and thread
2 small beads
Small pliers
Green wire (as used for flower arranging)
Measuring tape or ruler
|
|
|
|

|
|
1. Cut a 16 X 16 inch square from the Purple Smart-Fab
2. Cut a 16 X 16 inch square of dark Pink Smart-Fab
3. Cut 4 pieces of Yellow Smart-Fab 5 inches X 2 inches |
|
|
|
|
|
Making the Butterfly Wings
1. Fold the 16”x 16” Purple square of Smart-Fab in half and then in half again to make a four layer square.
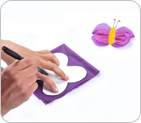
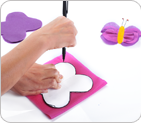
2. Using a marker, trace the outline of the “Large” butterfly pattern onto the purple Smart-Fab.
|
|
|
|
|
|
Making the Butterfly Wings
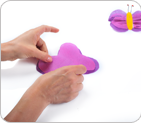
1. Fold the 16”x 16” Carefully cut along the outline you’ve marked, holding the Smart-Fab tightly so that the layers cannot move.
|
|
|
|
|
|
Fold the Dark Pink Smart-Fab into a square. Trace and cut out, using the “Small” butterfly pattern, repeating the above procedure.
|
|
|
|
|
|
|
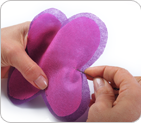
1 Place one of the “Small” butterfly forms on top of one of the “Large” butterfly forms. Be careful to keep it symmetrically centered, preparing them to be sewn together.
|
|
|
|
|
|
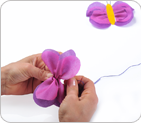
2 Using the needle and thread, make alternating over and under stitches (basting stitches) along the length of the butterfly’s body. Stitch in the middle of the butterfly form.
|
|
|
|
|
|
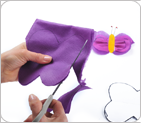
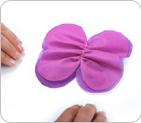
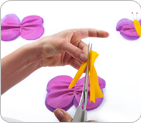
3 When you have stitched all the way, pull the thread while pinching the body.
|
|
|
|
|
|
4 Create small wrinkles along the length of the seam. Knot the end of the thread close to the fabric and cut off the remainder.
|
|
|
|
|
|
5. To make the body of the butterfly. Take one piece of Yellow Smart-Fab 5”x2”and fold it in half and then fold it in half again. With your hand holding the folded side of the fabric, cut around it to create a rounded finger-shaped form, slightiy longer than the length of the butterfly body.
|
|
|
|
|
|
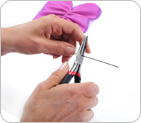
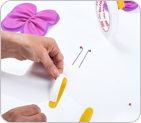
6. To make the butterfly’s antennae, take the Green wire and use a pliers to cut off two pieces, each 2 ½ inches long.
|
|
|
|
|
|
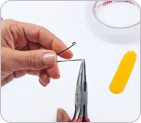
7. Create a small curl in the end of each piece of wire with the pliers.
|
|
|
|
|
|
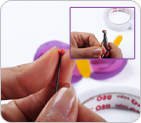
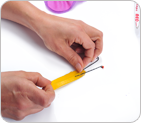
8. Beginning from the straight end, thread one of the beads along each piece of wire until reaching the curled end. Then, use the pliers to bend the end of the wire in order to hold the bead in place.
|
|
|
|
|
|
9. Take one of the strips of Yellow Smart-Fab you prepared earlier and place a piece of double-faced tape on it. (This process can be done with fabric glue instead of double-faced tape.)
|
|
|
|
|
|
10. Now, press the straight ends of the wire antennae into the end of the strip of fabric and the double- faced tape. Cover one strip with the other strip so that the straight ends of the wire antennae are hidden between the two strips. This completes the butterfly’s body.
|
|
|
|
|
|
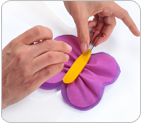
11. Glue the butterfly’s body to the middle of the wings.
|
|
|
|
|
|
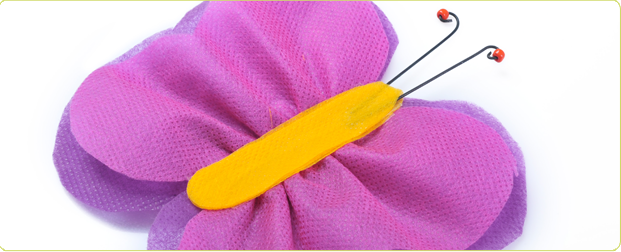
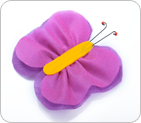
That’s it! You’ve got a butterfly!
|
|
|
|