|
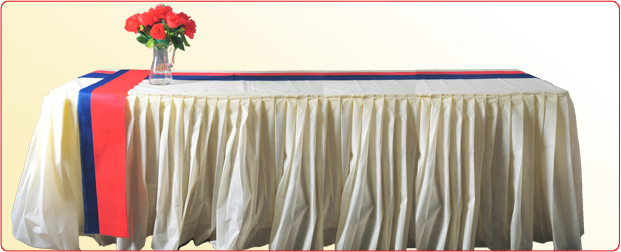
“Decorative Table”
Prepare your “Event” or “Holiday” tables the easy way, with Smart-Fab!!
“THE SET-UP” |
|
|
|
|
|
PREPARATION
“Skirting”. To prepare the two pieces of Smart-Fab for the “Skirting”, measure the length and width of the top of the table. You will need three times the measurement for each side, with a height of thirty inches from the table top to the floor. (I.e. if your table is two ½ feet x 4 feet- you will need to make each piece of Smart-Fab seven ½ feet plus 12 feet or 19 ½ feet long x 30 inches wide for the height.) |
|
|
|
|
|
You also have the option to use just one piece of Smart-Fab for the”Skirting”, by doubling the length and width measurements. (Again, You will need three times the measurement for each side)
Cover. For the cover of the table use the measurement again of the width and length of the top of the table, adding about four inches all around. The extra four inches will be folded and secured to the underside of the table. |
|
|
|
|
|
“Table Runners” Each color has to be measured to include two times the height of the table, plus the length or width measurement, by however wide you want the “Table Runners”.
|
|
|
|

|
|
PROCEDURE
Making the “Skirting”
1. Using a tape measure, mark two inches along one edge of the length of your piece, or pieces of Smart-Fab that are being used for the “Skirting”. |
|
|
|
|
|
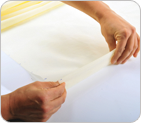
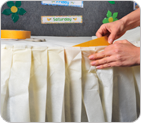
2. At every other two inch mark “pull” up a pleat that will be 2 inches deep. You will be able to use the two inch mark on each side of the “pulled” up pleat to be sure it is two inches deep. |
|
|
|
|
|
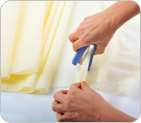
3. Staple the bottom of each “pulled” pleat about two inches down from the edge of your Smart-Fab. |
|
|
|
|
|
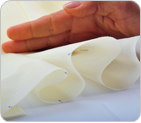
4. After you have made a few pleats you will be opening them and flattening them out. Flatten all the way down the pleat. They are to look like “Scottish Kilt Pleats”. Repeat this procedure along the entire length of the “Skirting”. |
|
|
|
|
|
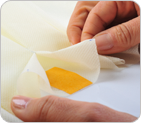
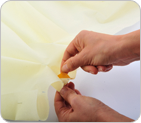
5. When you have finished making all the pleats, turn the Smart-Fab over to the reverse side. Notice that under each pleat at the edge where you have been working, there is an opening. The opening needs to be closed. Fold back the two sides that you see and place a piece of double-sided adhesive tape inside each of these openings. Do this for each pleat along the entire length of the Smart-Fab. |
|
|
|
|
|
6. Remove the covering of the double sided adhesive tape. |
|
|
|
|
|
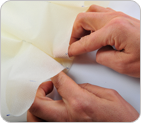
7. Press the openings closed onto the tape. All the openings need to be closed, so that the reverse side of the "skirting" is flat. |
|
|
|

|
|
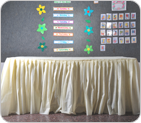
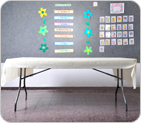
Making the Cover for the Table Top:
Take the piece of Smart-Fab that you measured to use for the cover of
the table top and fit it onto the table. There should be an overhang of
four inches on all sides. Fold the overhang under the table and tape it securely so when you attach the “Skirting” the cover will not move.
|
|
|
|
|
|
Assembling the Table
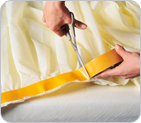
1. To attach the “Skirting” to the table, affix the double-sided adhesive tape all along the reverse side of all the “Skirting”.
|
|
|
|
|
|
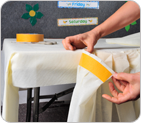
2. This next step is more easily done with two people. However, one person can also easily attach the “Skirting” by working in sections. Pin all the “Skirting” around the edge of the table to the table cover. Remove a section of the “Skirting" and then remove the backing of the double sided adhesive tape. Press the “Skirting” onto the cover. |
|
|
|
|
|
3. Straighten the pleats as you work around the table until you have attached all the “Skirting. |
|
|
|

|
|
All of the steps to create the “Skirting” and attaching it to the table cover can be done with needle and thread.
|
|
|
|
|
|
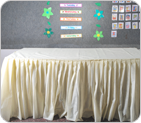
Your table is now ready for any additional decoration! |
|
|
|

|
|
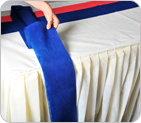
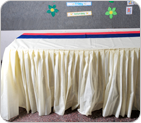
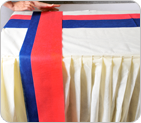
“Table Runners”
1. Take the two pieces of Smart-Fab that you measured for length of the table. Lay down the first color wherever you choose.
|
|
|
|
|
|
2. Overlap the second color being sure to show some of the first color beneath it. |
|
|
|
|
|
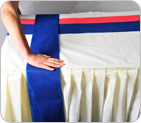
3. Reverse the colors of Smart-Fab when you lay down the two pieces that you measured to use for the width of your table. |
|
|
|
|
|
4. When you lay down the second color, be sure again to show some of the first color beneath it. |
|
|
|
|
|
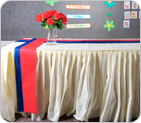
Your “Decorative Table” is complete!
|
|
|
|